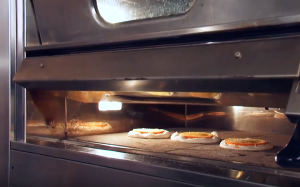
Do you dream of baking the perfect, crispy-on-the-outside, soft-on-the-inside pizza crust? Many people do, though mastering the recipe can take years of practice. Certain ingredients, special techniques, and meticulous fermentation are all critical steps of the pizza-making process that have the ability to make or break the entire pie. Pinsa Romana America has the art of hand-pressing Roman-style pizza dough down to a science, and we’re here to help you do the same!
Pinsa: Ancient Roots, Modern Palates
In the days of ancient Rome, there was a recipe so divine, it still graces today’s dinner tables. It was called pinsa, revered for its mesmerizing fragrance, crisp texture, and a mouth-watering flavor profile to complement all toppings.
Unlike traditional modern pizza crust, pinsa is made with non-GMO rice, soy, wheat, and sourdough flours, up to 80% hydration for easy digestibility, and no added fats or sugars. Its recipe is naturally vegan, gluten-friendly, and delicate in texture—allowing pizza-lovers the chance to indulge without regret!
Other than the clean ingredients, the thorough pressing process is what truly makes the crust so light and airy. Named after the Italian word “pinsere,” meaning “to press,” pinsa crust requires the artisanal, and some may say tedious, technique of hand-pressing the dough. It takes practice to perfect, but the end result is always worth the wait.
Pressed to Perfection
Pinsa’s signature cloud-like structure is thanks to the careful and traditional practice of hand-tossing and hand-pressing the dough. Using the magic touch of their fingertips, food artisans stretch and press into the pinsa dough, beginning at the center and kneading out toward the edges. This process ensures preservation of the gases created during the 48-72 hour fermentation process. The result? A light, supple structure that, while practically weightless, is packed with flavor.
Pinsa Recipe
Crafting a homemade pinsa crust will enchant your guests and please every palate. Try this recipe and garnish the top with whatever your heart desires, because the crust’s flavor profile is universally loved. The top-abilities are truly endless!
Ingredients:
- 1 cup “zero” wheat flour
- 1 cup soy flour
- 1 cup rice flour
- 1 cup sourdough flour
- 1 ⅔ cup cold water
- 1 tbsp extra virgin olive oil + more for rubbing
- 1 tsp salt
Directions:
- In a large bowl, mix “zero” flour, soy flour, rice flour, sourdough flour, and yeast together.
- Slowly add cold water while continuously whisking the mixture.
- Mix in extra virgin olive oil and salt. Cover the bowl with plastic wrap and allow wit to rest for 30 minutes. Mix again and allow it to rest another 30 minutes.
- For the third time, mix with a wooden spoon.
- Cover the bowl again with plastic wrap and place it in the fridge for 48-72 hours. This allows the dough to go through a fermentation process, which is essential for pinsa.
- After 48-72 hours, turn the bowl upside down and allow the pinsa dough to fall out.
- Using your hands, divide the dough into 2 parts and form each piece into a round ball.
- Cut out 2 rectangular pieces of parchment paper that will fit into a baking sheet.
- Place a dough ball onto each piece of parchment paper and dust lightly with rice flour.
- Cover the dough with a linen towel and allow it to rise for 60 minutes.
- After 60 minutes, pour a drizzle of extra virgin olive oil on each piece of dough. Using your fingers, hand-press and hand-stretch the dough.Press into the dough, stretching it from the center into the sides, until it forms a long oval shape.
- Bake both pinsa crusts in the oven for 10 minutes at 450 degrees fahrenheit.
- Add the toppings of your choice and place the pinsa crusts back in the oven until the edges have slightly browned.
- Buon appetito!
Follow these steps, and you’ll have an enticing aroma lingering in your kitchen while your oven bakes the perfect, hand-pressed pinsa base for your meal. Trust us, your hard work will pay off after one bite of this traditional Roman pinsa!

Perhaps your first attempt at crafting homemade pinsa doesn’t go according to plan. Or maybe you’re simply too busy to spend hours in the kitchen preparing such a complex base for your dish. No one said making authentic Italian pinsa was easy. Luckily, we have a lot of practice.
Pinsa Romana America offers par-baked pinsa crusts perfect for any kitchen—big or small. The crusts are already hand-pressed in our SQF-certified kitchen and ready to ship to your door. Versatility knows no bounds. All you have to do is top with fresh ingredients, pop in the oven for just a few minutes, and presto! you’ve made a delicious Roman-style pinsa without the hassle!
Join the Pinsa Romana America family today! For more information on our authentic, par-baked pinsa crusts, visit our website.


